</div>
Contents |
There were essentially four DNA pieces that we wanted to combine together to make a construct: The tat signal sequence followed by GFP, a small linker region and RFP put into a plasmid backbone. As our cloning techniques rely on overlapping DNA fragments we used mostly primers with overhengs in the PCR reactions. As templates we used the biobricks <partinfo>BBa_E1010</partinfo> for RFP, <partinfo>BBa_E0040</partinfo> for GFP, <partinfo>BBa_J01101</partinfo> for the plasmid backbone and genomic DNA from ‘’Escherichia coli’’ strain ER2566 for the tat signal sequence.
Table: Primers applied in creating the tat_GFP_l_RFP construct. Lowercase letters indicate DNA that anneal to the template whereas the uppercase letters indicate DNA that serves as an overhang.
| Amplifing | Primer | Sequence |
|---|---|---|
| tat | F_pl.b_tat | AGAGAAAGAGGAGAAATACTAGatggccaataacgatctctttcaggcatcacg |
| tat | R_tat | cgcttgcgccgcagtcgcacgtcg |
| GFP | F_tat_GFP | CGACGTGCGACTGCGGCGCAAGCGatgcgtaaaggagaagaac |
| GFP | R_l_GFP | ACTACCACCGGATCCACCTGATCCACCGGATCCACCtttgtatagttcatccatgcc |
| RFP | F_l_RFP | GGTGGATCCGGTGGATCAGGTGGATCCGGTGGTAGTatggcttcctccgaagacg |
| RFP | R_pl.b_RFP | GCCTTTCGTTTTATTTGATGCCTGGgcgatctacactagcactatcagcg |
| Plasmid backbone | F_pl.b | ccaggcatcaaataaaacgaaagg |
| Plasmid backbone | R_pl.b | ctagtatttctcctctttctctagtagtgc |
The linker region is going to be only 36 bp long and will therefore be created by overlapping overhengs on the reverse primer of GFP and forward primer of RFP. The primers for the plasmid backbone is designed to include the TetR repressible promoter (<partinfo>BBa_R0040</partinfo>), RBS (<partinfo>BBa_B0034</partinfo>) and two terminators (<partinfo>BBa_B0010</partinfo> and <partinfo>BBa_B0012</partinfo>) in the PCR product. All of the PCR products were treated with the enzyme DpnI that digests methylated DNA and purified by the QIAquick PCR Purification kit.
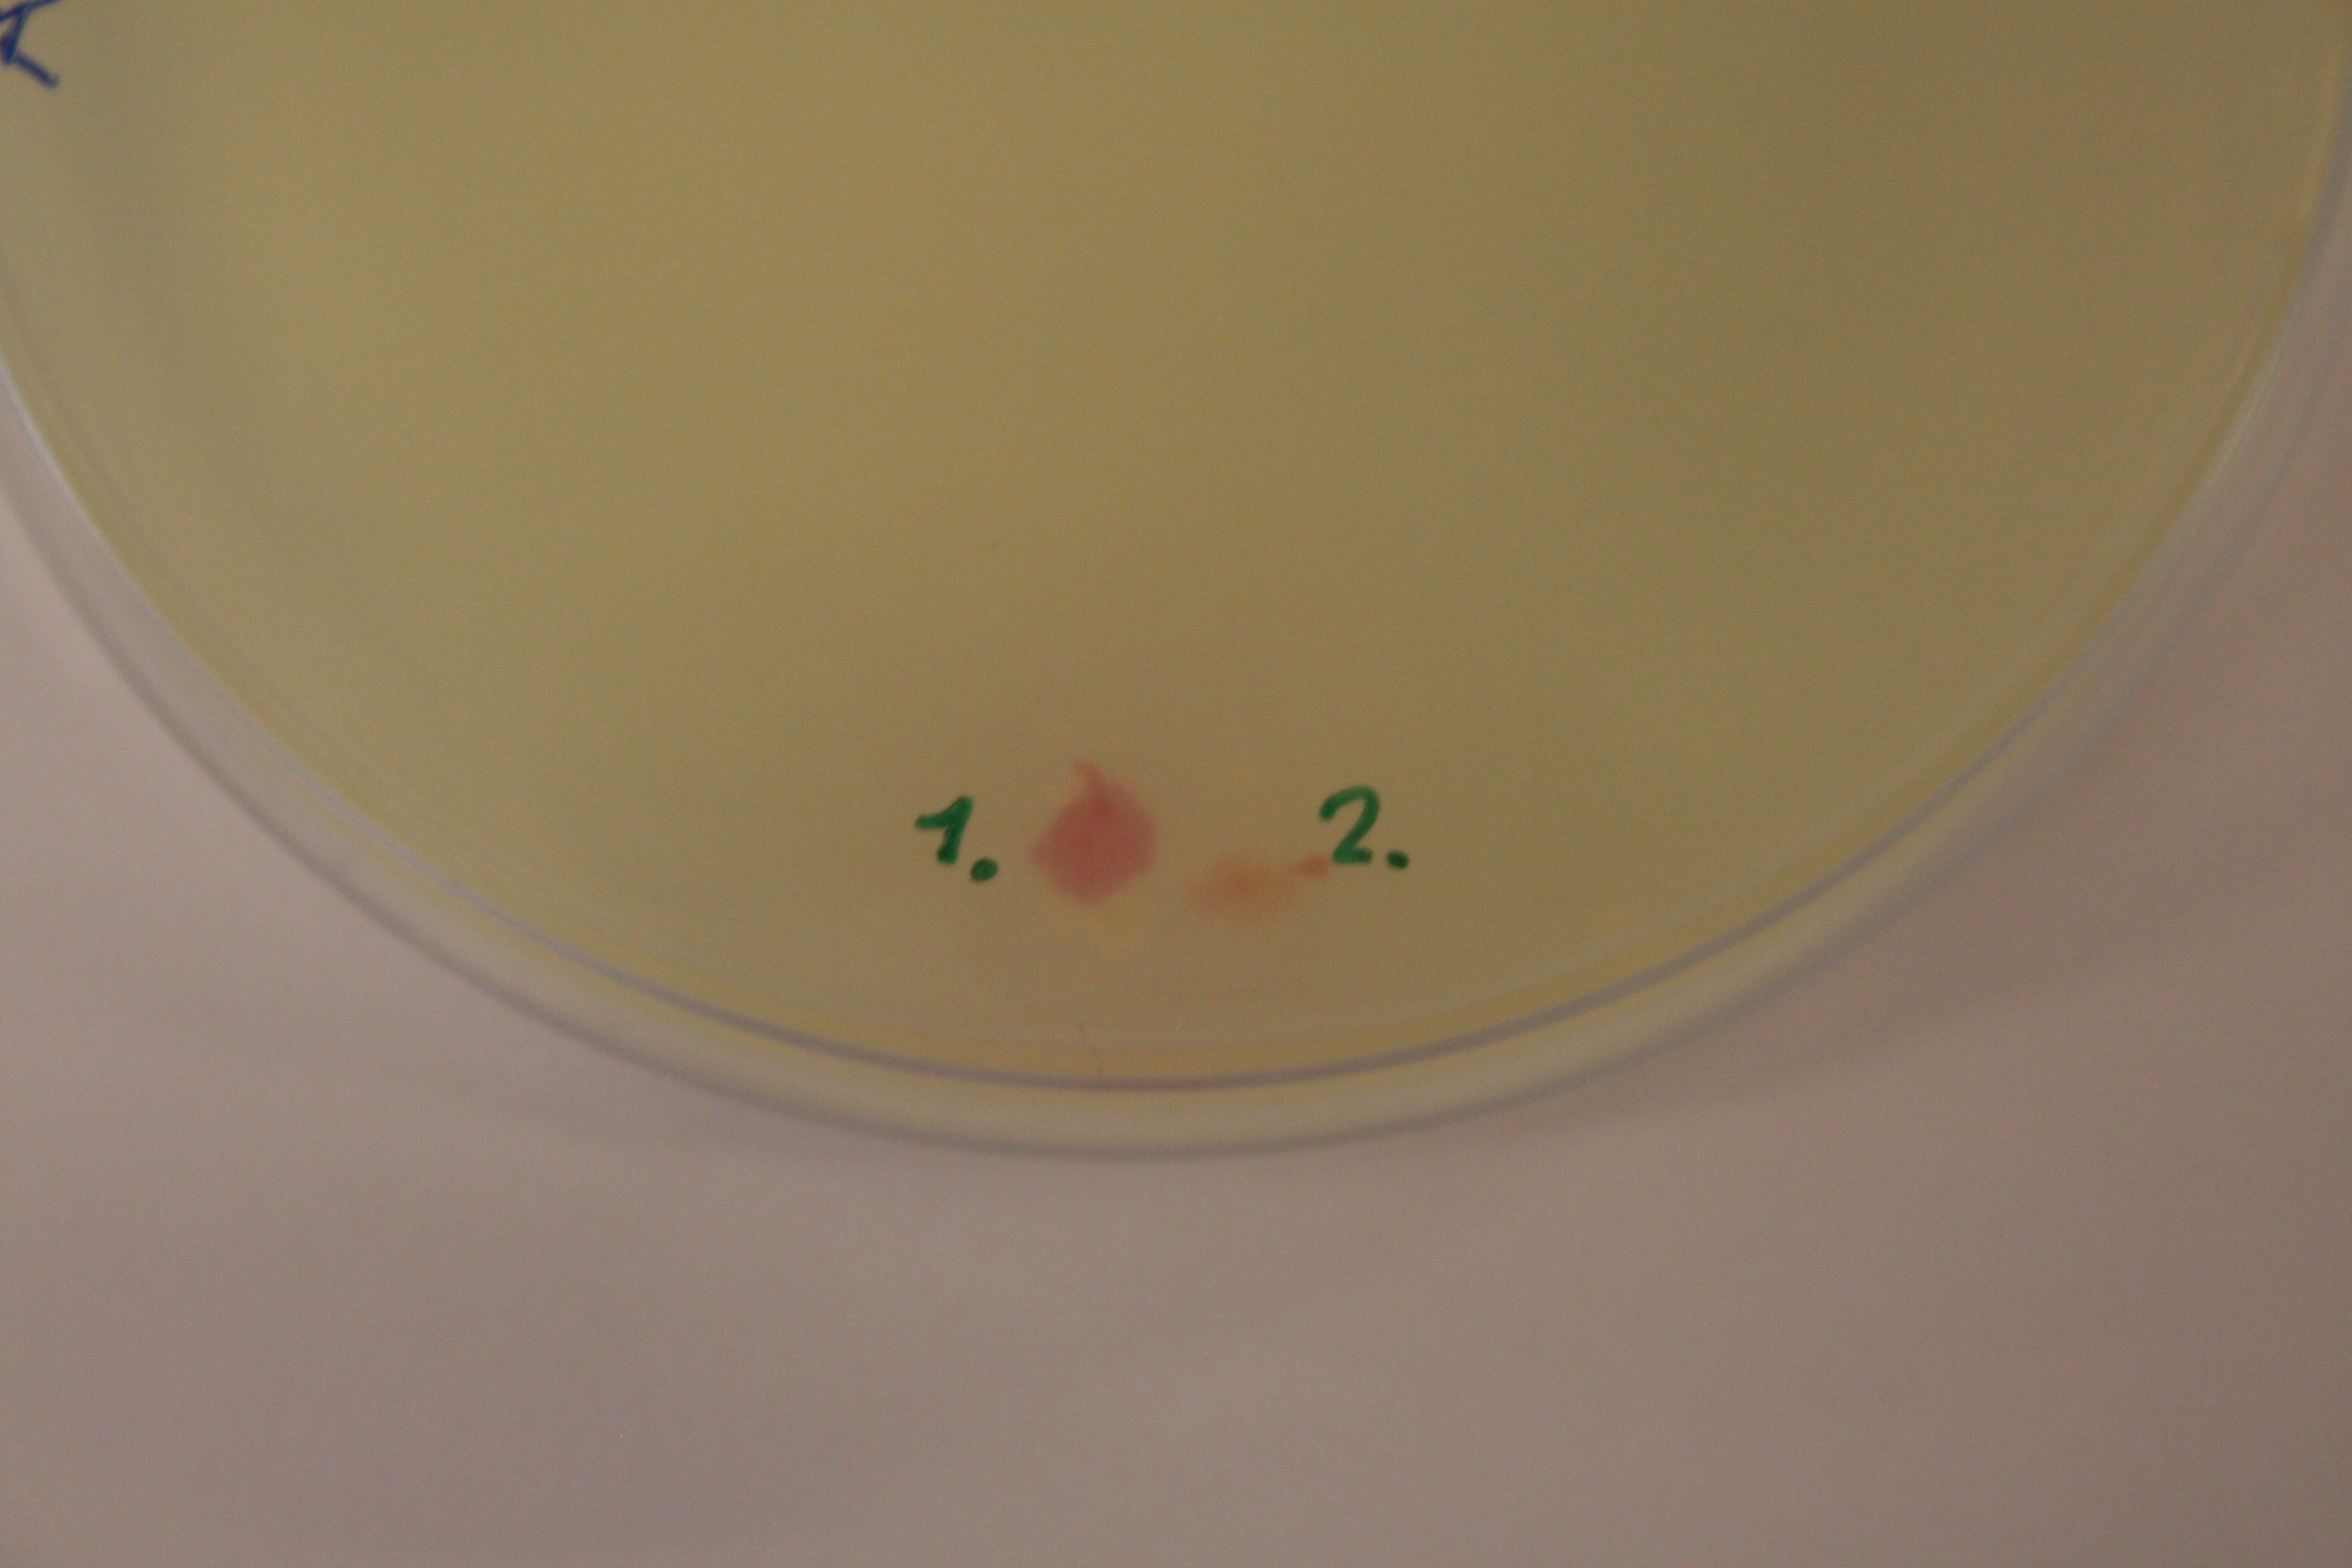
Our overlapping DNA fragments; tat, GFP, RFP and plasmid backbone was cloned together by Gibson Assembly and transformed into ‘’E.coli’’ strain ER2566 cells. The photograph below shows two of the resulting colonies (named ER1 and ER2) from this transformation.
The plasmid from the ER1 samples was isolated by the Promega Wizard Plus SV Minipreps DNA Purification System A1460 and sequenced. Figure below shows the alignment of the sequencing results with the reference DNA sequence.
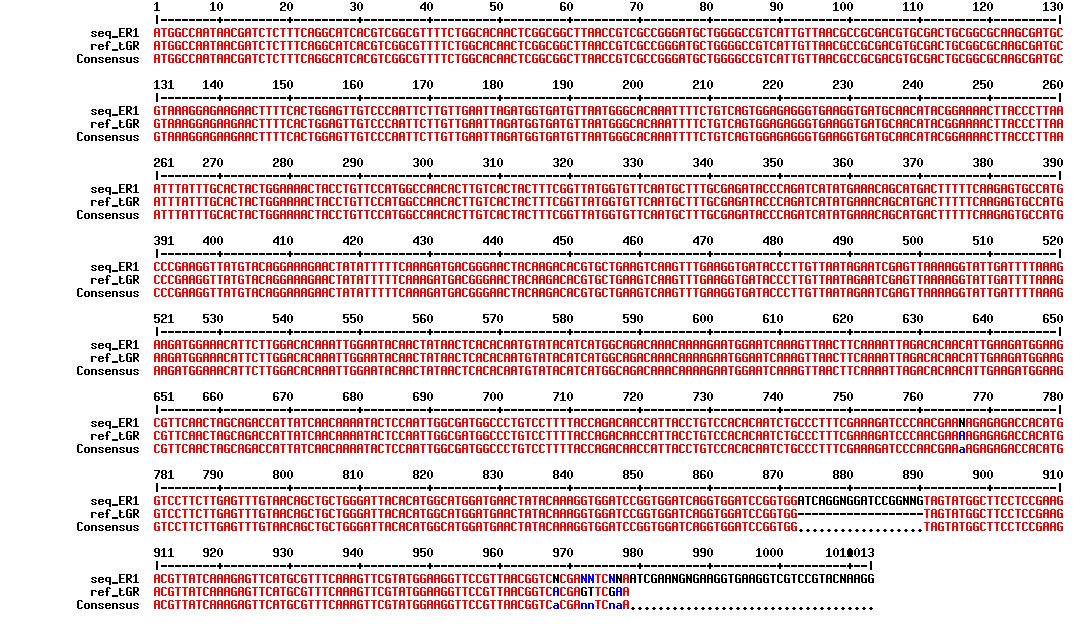
The sequence align almost perfectly. There seems to be some sort of extra insert at the linker region, but this insert is dividable by 3, so the reading frame is maintained. This is supported by the fact that the colonies with this construct is red (see figure above).
Red ER1-cells in liquid media was immobilized in agar and then viewed in a confocal microscope for seeing if RFP was localized in the periplasm. The results can be seen in the two figures below:
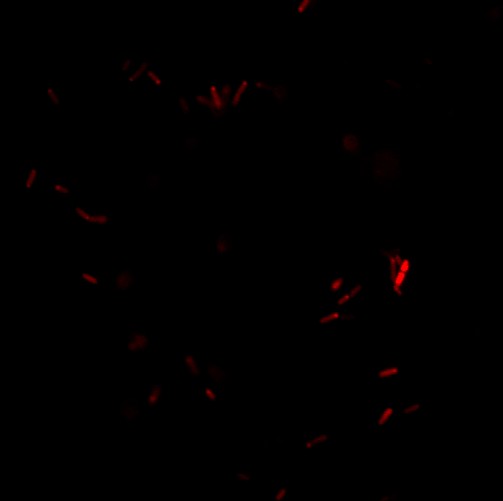
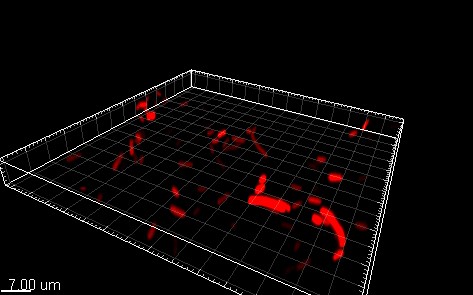
There is no indication that the red fluorescence is more concentrated in the periplasm, as we should expect due to the transport through the tat transport pathway.
We performed a excitation and emission scan of the ER1 bacterias together with E-coli strain ER2566 cells that were transformed to produce single RFP. The samples were centrifuged and the pallets were resuspended in DPBSS buffer. These solutions were den studied in a fluorometer(see figures below):
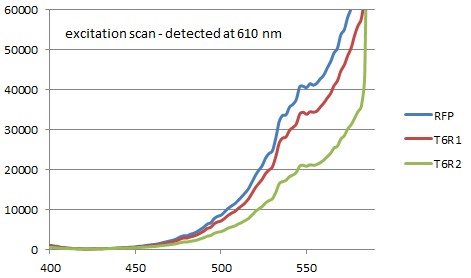
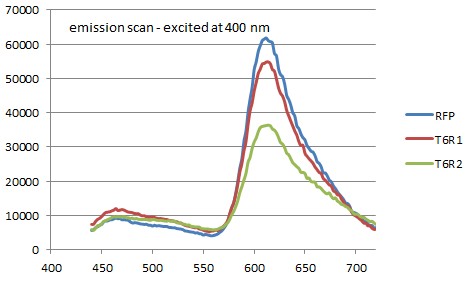
There are no significant differance between the referance sample and the ER samples. It seems that GFP is not present or doesn't fold properly. All of the samples had an excitation/emission at 584/607 which is the same as for singel RFP (<partinfo>BBa_E1010</partinfo>).
Vesicles were isolated from ER1 cells and wildtype ‘’E.coli’’ strain ER2566 cells by the vesicle isolation protocol. SDS-PAGE was done on both samples with one diluted sample (1:2) and one undiluted sample (1:1) for both.
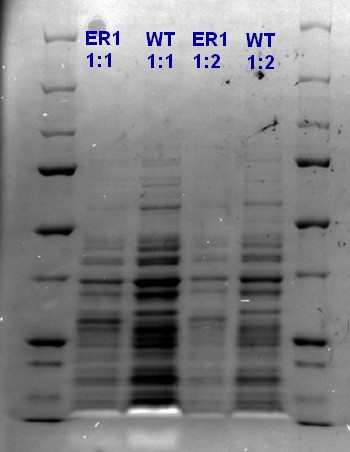
There are no additional bands in the ER1 samples compared to the unstransformed ER2566 sample, indicating that there is no GFP-RFP in the vesicles.
There was run an excitation scan of the undiluted vesicle ER1 sample that was compared to a same scan on vesicles from wildtype bacteria. The results were as shown in the two figures below.
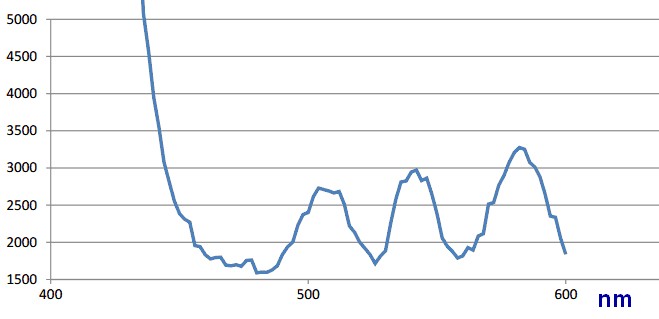
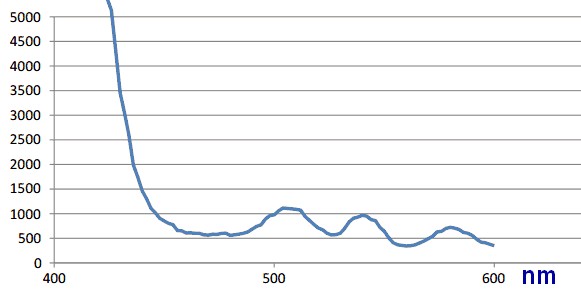
There is no real difference between the samples other than strength of the signals. Both samples have peaks at 504, 540 and 582 nm. It is likely that there is no detectable GFP-RFP dimer in the vesicles.
Our template for this PCR reaction was genomic DNA from Streptococcus dysgalactiae ssp equisimilis collected from St. Olavs Hospital. We had 5 different samples of Streptococcus dysgalactiae ssp equisimilis and 6 different combinations of primers giving 30 different PCR reactions. Standard conditions for Phusion PCR was used. As indicated in the figure below, only one of these reaction gave a PCR product.
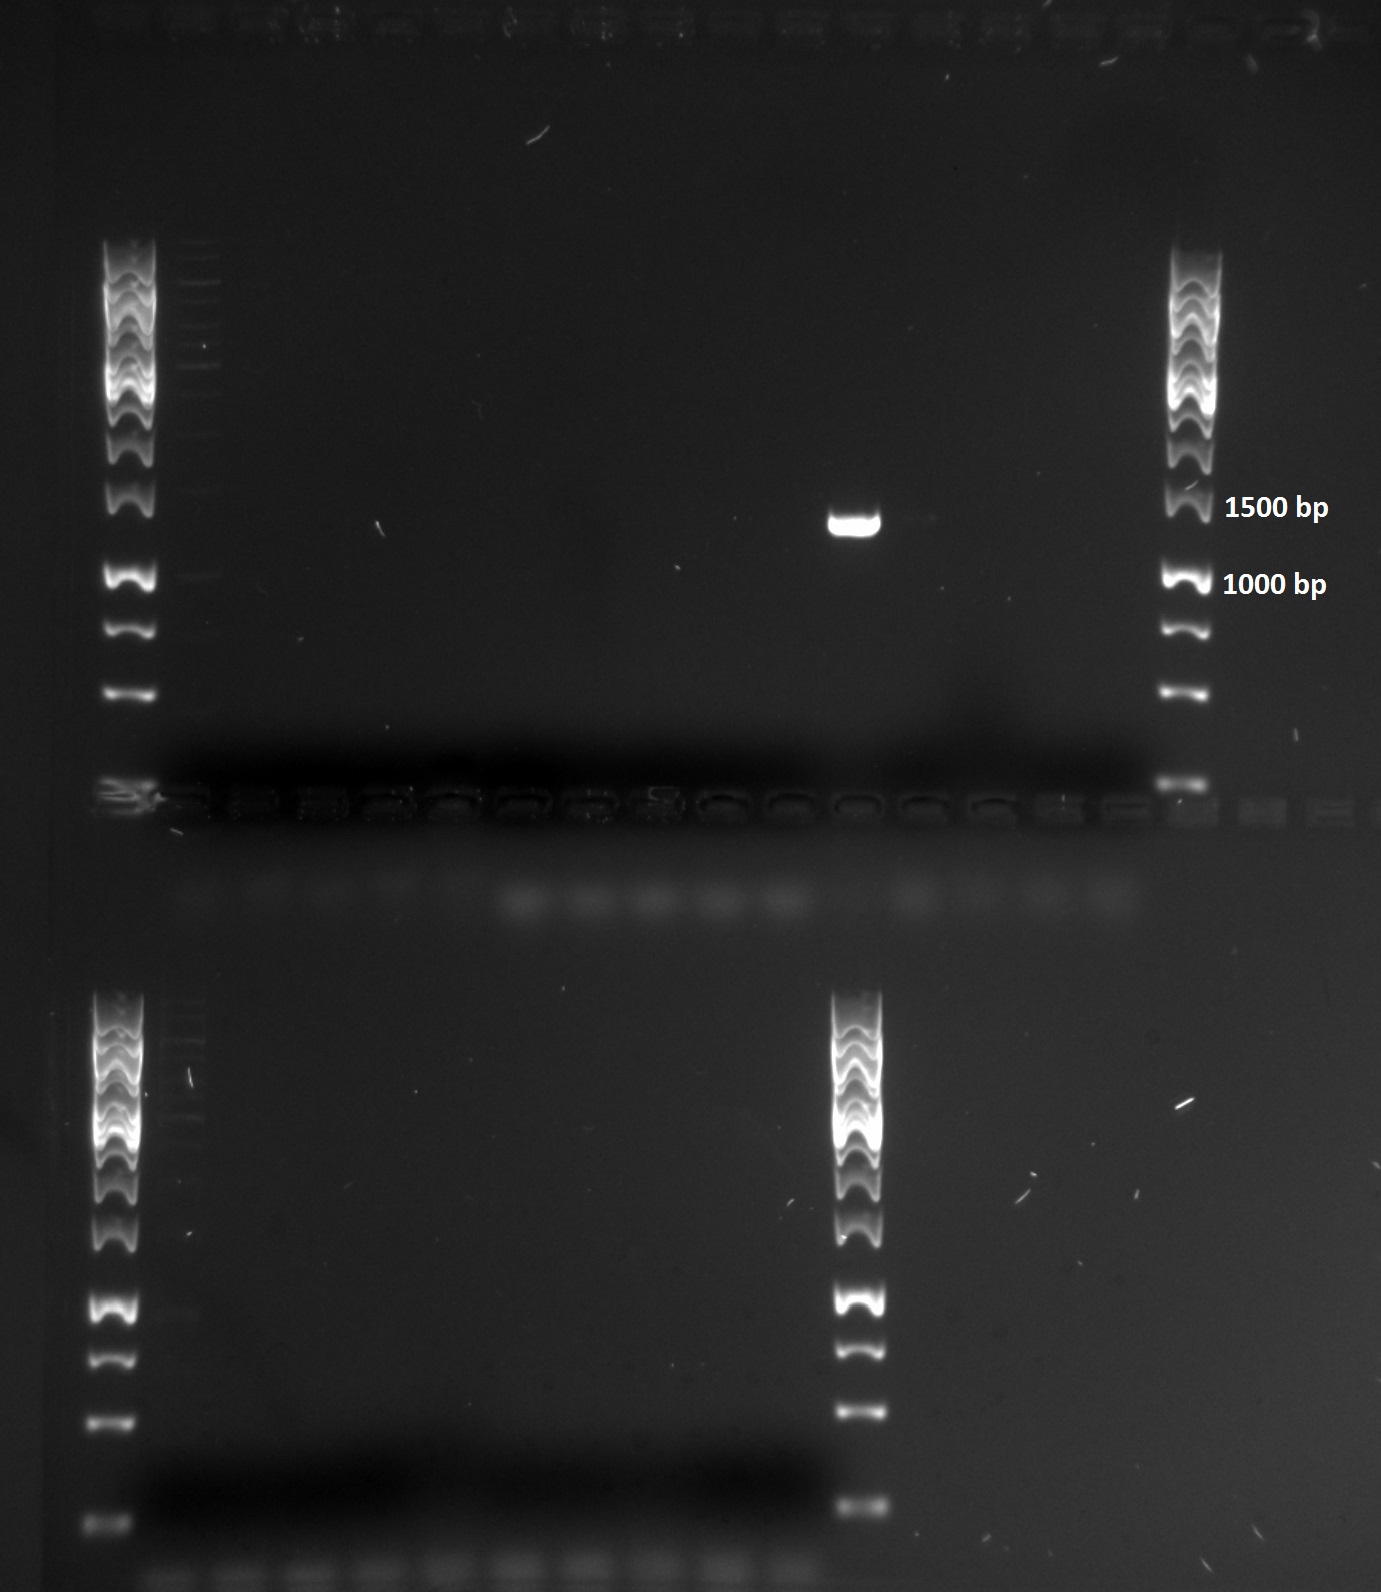
A very clear band with the size of around 1200-1300 bp was found in one of the samples. This is a smaller DNA fragment compared to the known gene sequence of about 1700 bp. Since the size of Protein G is known to vary among the different strains, we can still conclude that our PCR-product is Protein G. The PCR product with the genomic DNA sample 1 as template and F_tat_PrG and R_pl.b_PrGstop (see table below) as primers is most likely Protein G.
Table: Primers applied in creating the tat_ProteinG construct. Lowercase letters indicate DNA that anneal to the template whereas the uppercase letters indicate DNA that serves as an overhang.
| Amplifing | Primer | Sequence |
|---|---|---|
| Protein G | F_tat_PrG | CGACGTGCGACTGCGGCGCAAGCGgttgactcaccaatcgaagatacccc |
| Protein G | R_pl.b_PrGstop | GCCTTTCGTTTTATTTGATGCCTGG ttagtcttctttacgttttgaagcgac |
For attachment of the tat DNA fragment to the Protein G PCR fragment Polymerase Extension Cloning (PEC) was applied. After the PEC PCR reaction the product was run on a agarose gel together with the PCR product of Protein G without the tat attached.
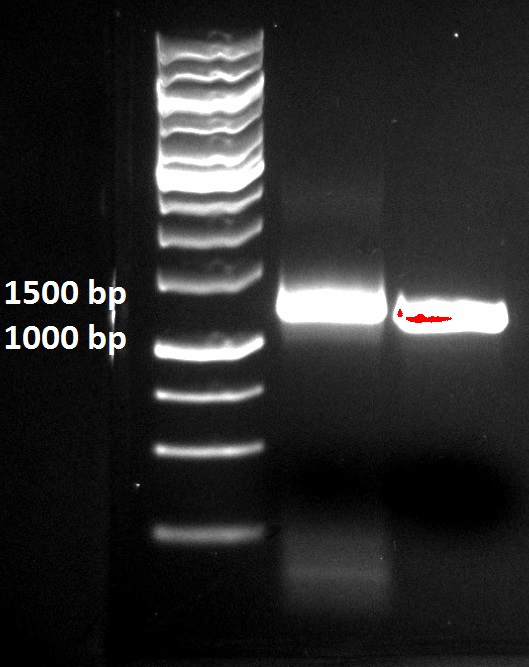
The PEC product is clearly a little bit longer then the Protein G PCR product without tat attched. This indicates that PEC was successful.
The tat_ProteinG fragment was mixed with the same plasmid backbone PCR product that was produced for the tat_GFP_l_RFP construct in varies different cloning reactions: CPEC, SLIC and transformation. 18 different reactions was run. The cloning products was transformed into ‘’E.coli’’ DH5α cells. The plasmids were then isolated and a conformation PCR was executed with F_pl.b_tat and R_pl.b_PrGstop as primers. The conformation results can be viewed in the figure below:
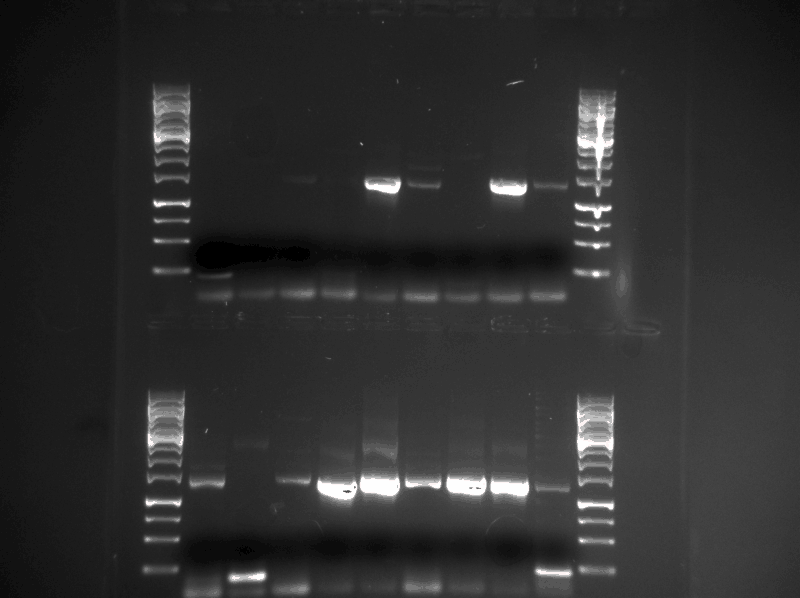
All of the samples that had a PCR product of the expected size of 1200-1300 bp (10 samples) was sent for sequencing. The sequencing results showed that two of the constructs had approximately the DNA sequence they should have. However, these constructs, named Dt8 (created by direct transformation) and S3 (created by SLIC) had an addition and a deletion of a guanine residue in the beginning of the tat sequence, respectively (see figures below). These errors would create a frame shift that would produce a dysfunctional Protein G.
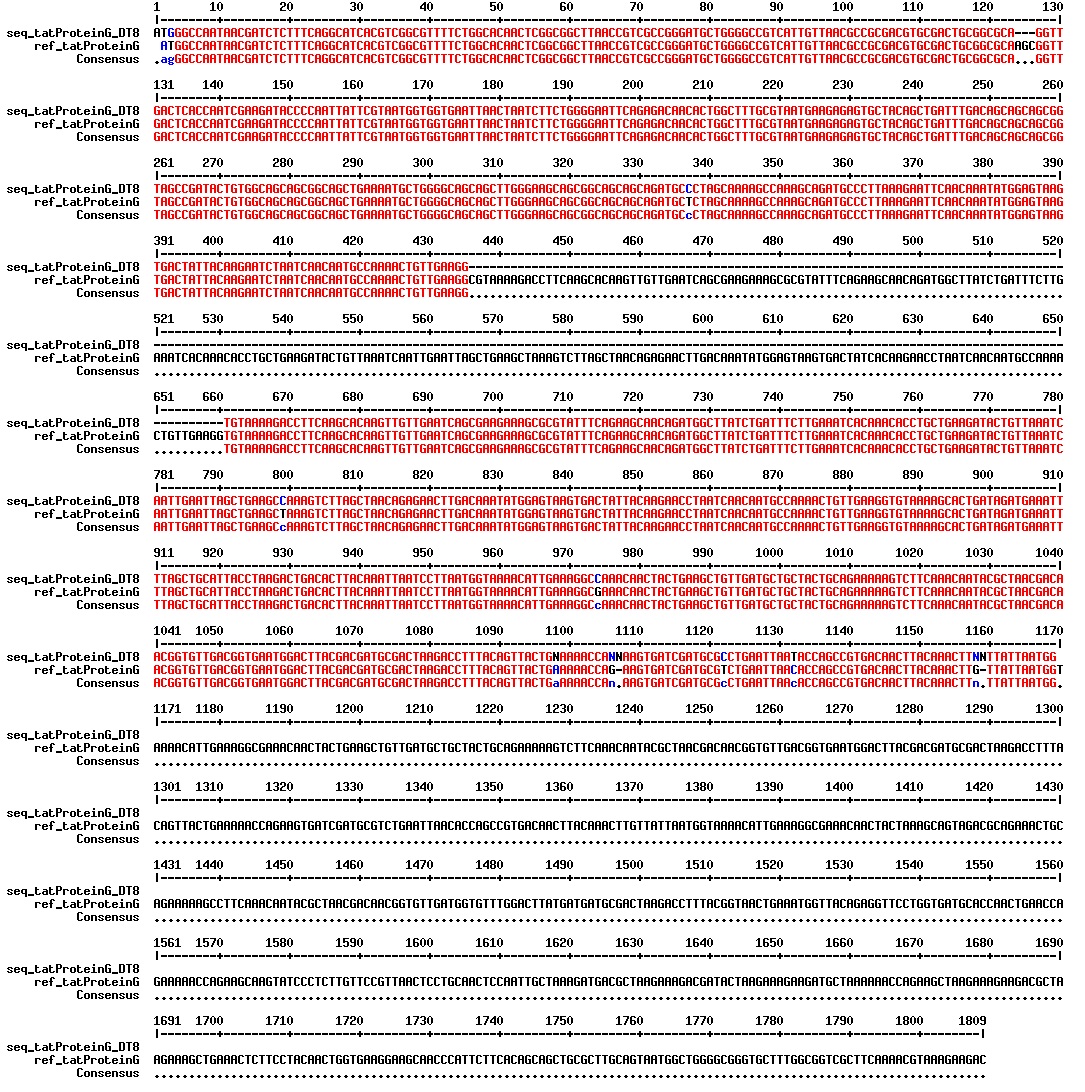
Because it is only possible to sequence approximately 1000 bp, we don't have all of the sequence of our tat_ProteinG construct.
In order to correct the Guanin deletion/addition a PCR was run on the DT8 and S3 sample with the primers F_pl.B_tat and R_pl.b_PrGstop. The PCR products was cloned together with the same plasmid backbone in a direct transformation. Plasmids from the transformed E.coli DH5α cells were isolated and sequenced. One of the new construct originated from PCR with the S3 sample has the desired DNA sequence.