Team:NYMU-Taipei/Experiments/Protocols
From 2013.igem.org
| Line 357: | Line 357: | ||
{| | {| | ||
|- | |- | ||
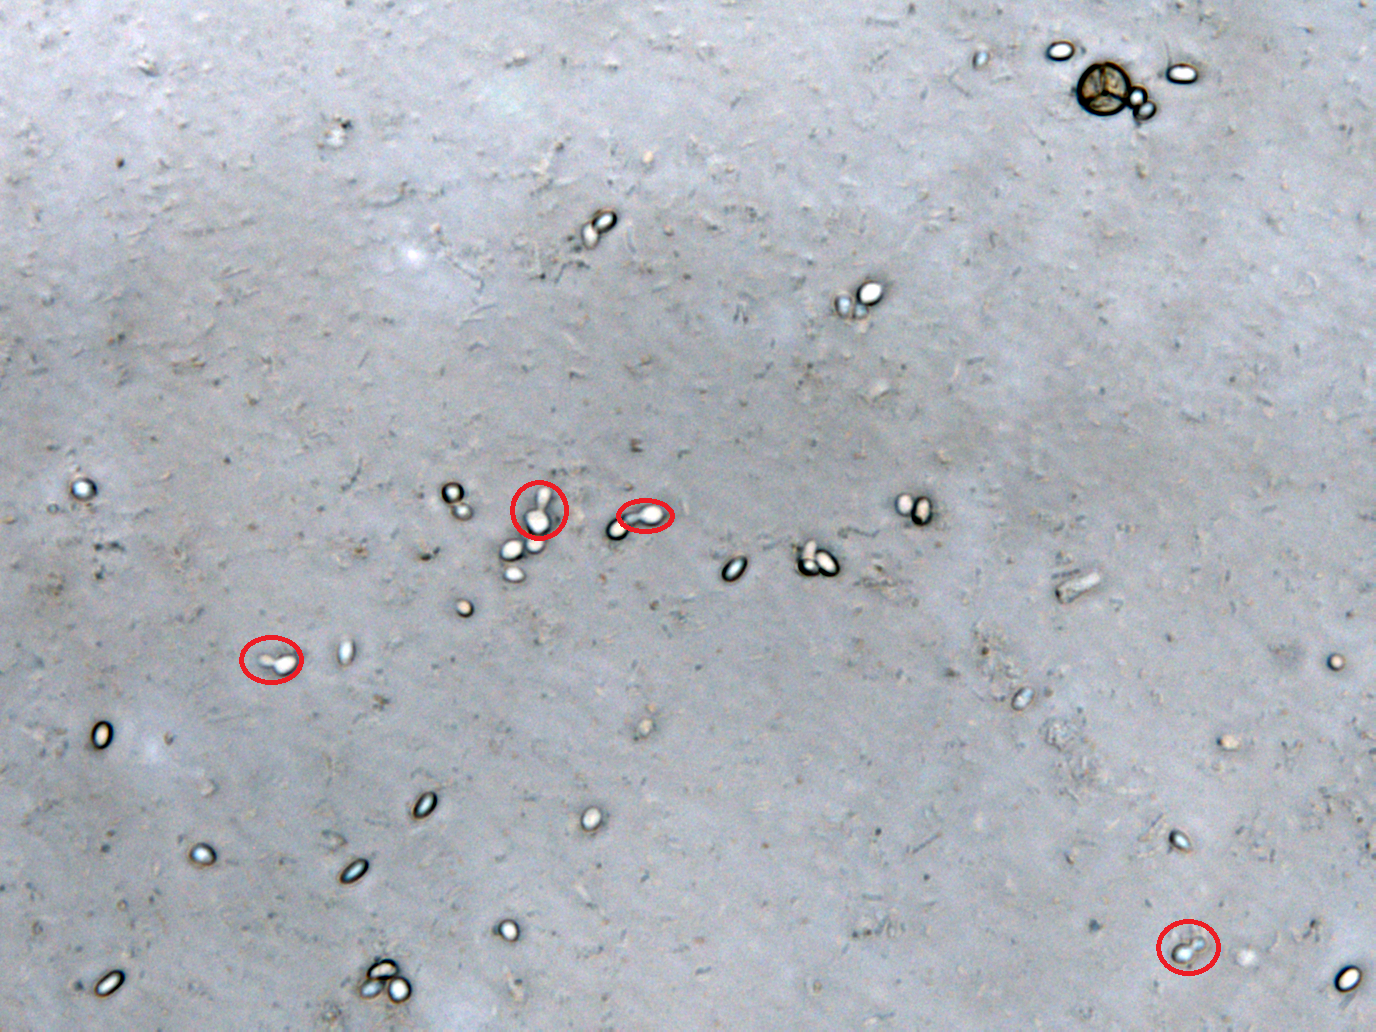
| - | |[[File:Nymu-Ptps5 .png|thumb| | + | |[[File:Nymu-Ptps5 .png|thumb|300px|''' 1 point:A spore begins its budding reproduction.''']]||[[File:POINT 1.png|thumb|300px|''' 2 points:A new spore is ccompletely germinanated from the old one.''']] |
|} | |} | ||
{| | {| | ||
|- | |- | ||
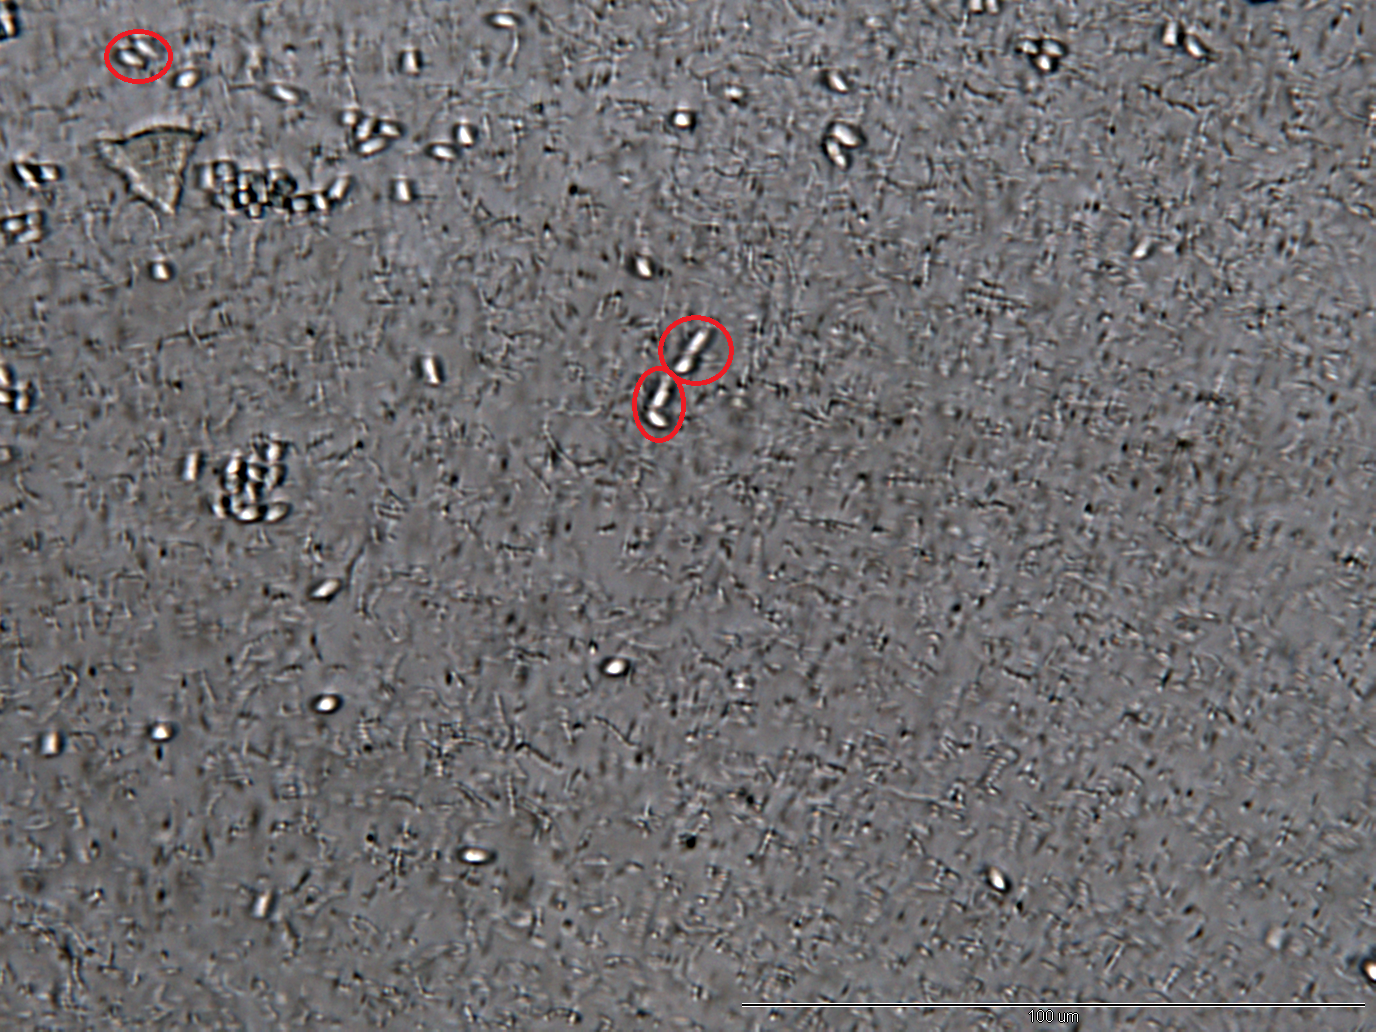
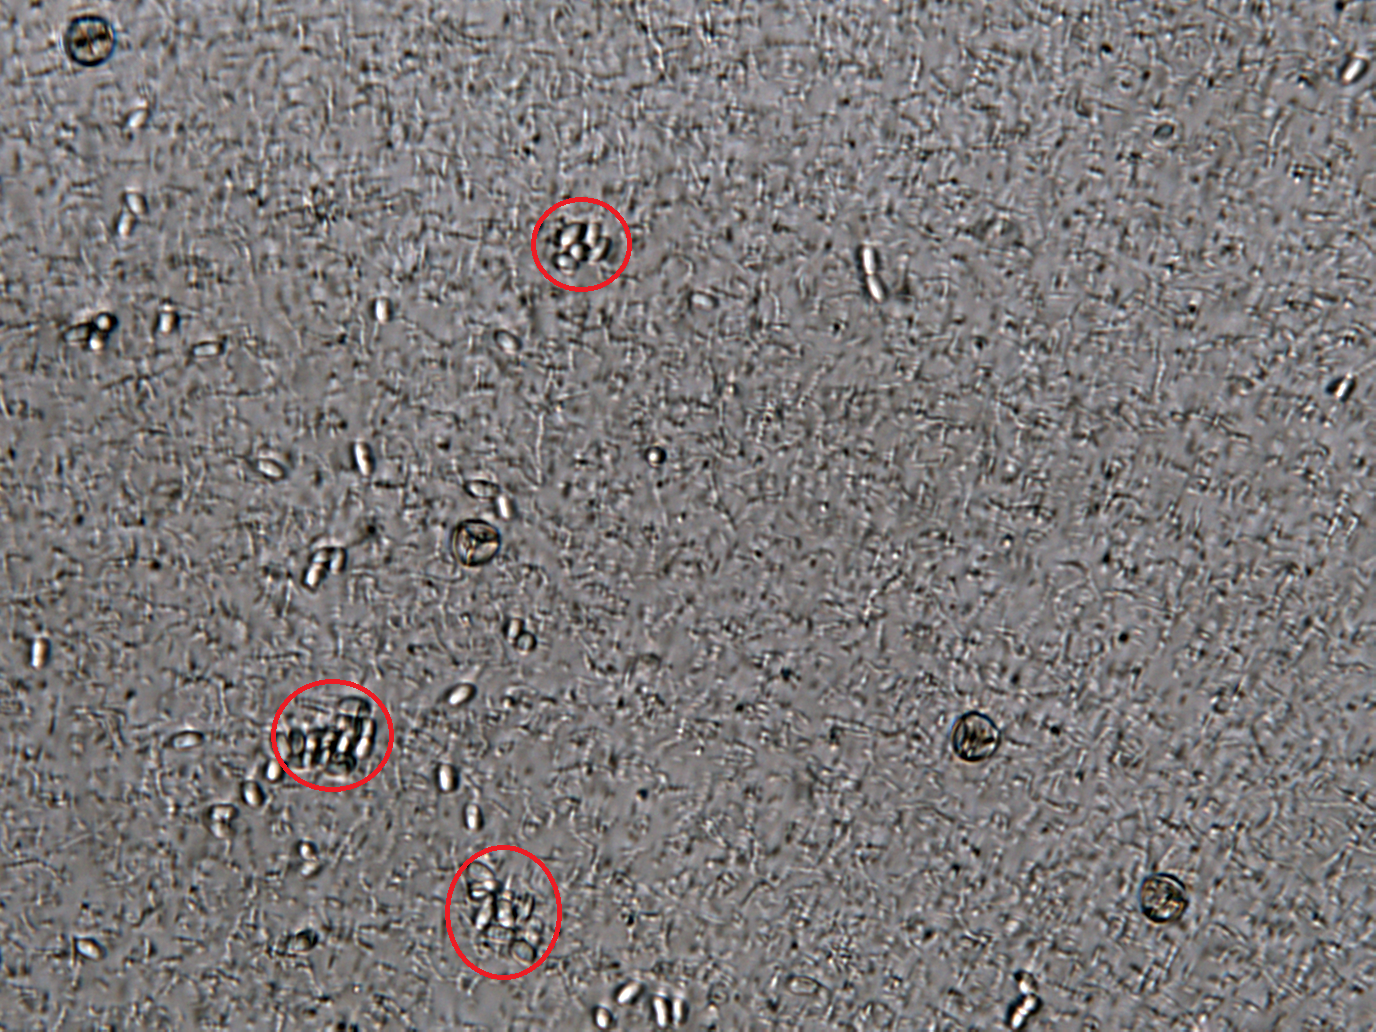
| - | |[[File:Nymu-POINT 2.png|thumb| | + | |[[File:Nymu-POINT 2.png|thumb|300px|''' 3 points:A cluster of duplicated spores is formed.''']]||[[File:Nymu-Tv10 ptp unsure.PNG|thumb|300px|''' 4 points:A Spore extrude a polar filament.''']] |
|} | |} | ||
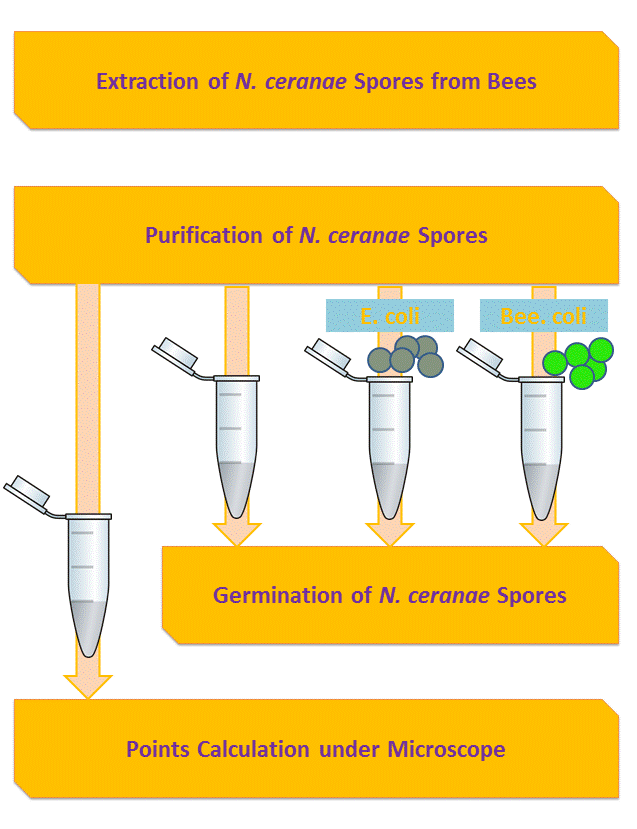
And so far we have accomplished experiments of the first two groups, discovering that spores underwent the germination procesure got much more points than the control group. Next we will compare the points of group 3 and group 4 to see if Bee. coli can inhibit the germination of N. ceranae. | And so far we have accomplished experiments of the first two groups, discovering that spores underwent the germination procesure got much more points than the control group. Next we will compare the points of group 3 and group 4 to see if Bee. coli can inhibit the germination of N. ceranae. | ||
Revision as of 15:53, 27 September 2013


Contents |
Labelling
Labelling tubes and plates in a consistent manner expedites the experimental process, and decreases the time taken to understand what others have done.
1.5ml microcentrifuge tubes
These 1.5ml microcentrifuge tubes are used to store extracted plasmids, cleaned up PCR or digested products, and frozen liquid culture.
Labelling:
- Black pen = Circular DNA, Blue pen = Linear DNA
- Folding part: Plasmid Backbone ("A" for pSB1A2 or "C" for pSB1C3 or "X" for other)
- On top (in this order):
- Item name
- Concentration (in ng/uL written in red)
- "(PCR)" for PCR products; "(XP)","(SP)","(ES)","(EX)" for digestions
- On the side:
- Date (YYYY-MM-DD),
- Person who made it,
- In red pen: the A260/280 and A260/230 ratios.
- For Digestions, write the number of hours (or "overnight") it was digested.
200uL microcentrifuge tubes
200uL microcentrifuge tubes (or PCR tubes) are used as temporary storage of various reactions such as digestions, ligations, colony PCR, and temporary liquid cultures.
Labelling:
- Folding part: Write the day of the month.
- On top: Write something that can identify what it is (at least one english letter).
- Additionally:
- Colony PCR tubes: Write everything in Black pen
- Colony PCR LB tubes: Write everything in Blue pen
- Digestion: Write the cutting site (e.g. SP,XP)
- Ligation: Make sure you put it in those small bags for 4C overnight ligation after 1uL is taken out for transformation.
Agar plates
Agar plates are for transformations and obtaining single colonies.
Labelling:
- On top (agar side):
- Full item names (not just numbers!), date (YYYY-MM-DD), time of incubation start.
- Additionally for transformation plates: Name of person who did the plating.
- On side (still on agar side): type of antibiotic (A/Amp or C/CHL/CM).
- On bottom (non-agar side): Don't write anything here.
PCR
For any kind of PCR, make sure you list:
- the things that are PCR'd, and their expected PCR lengths.
- the PCR mix protocol: write the 50uL first, then to multiply to get the new mix total version.
- the PCR time protocol (the 94,[94,55,72]x30-35,72).
- how the gel was loaded. Which wells was loaded with which items.
- Which items were correct and are wrong after the gel run, in as much detail as possible (e.g. was the output the length of a self-ligated vector?)
Two-day cloning cycle
We used an efficient two day cloning cycle split into a "Heavy" day and a "Light" day.
Approximate Light day:
- 10am (5min): Plate->4oC
- 10:05am(~1hr): 3-in-1, put liquid and plate in fridge.
- Lunch
- After lunch (~1hr): Run Gel
- 5pm: Incubate
Approximate Heavy day:
- 10am (2-3hrs): Plasmid extraction & Digestion
- Lunch (while digesting)
- After lunch (2-3hrs): Gel Extraction/Purification + Ligation + Transformation
- 5pm: Incubate plate
Light Day
The light day consists of Colony PCR and liquid culture of colonies transformed from a previous day.
The 3-in-1
The 3-in-1 protocol consists of a combination of three things:
- Colony PCR
- Liquid culture
- 2nd time plate
Time needed: [10min + 1min/colony]
Preparation
0. First, count the number of colonies you want to check.
1a. Make the Colony PCR mix (we use [http://www.thermoscientificbio.com/pcr-enzymes-master-mixes-and-reagents/dreamtaq-dna-polymerase/ Thermo' DreamTaq]) with the mix amount slightly modified:
| Item | uL |
|---|---|
| Template | 1 |
| FP (VR) + RP (VF2) | 2 |
| dNTP (2mM) | 2 |
| 10x DreamTaq buffer | 5 |
| Taq Polymerase | 0.2 |
| ddH20 | 39.8 |
| Total | 50 |
We aliquoted 15uL of PCR mix for each colony.
1b. Aliquot 20uL of LB medium in a PCR tube for each colony. Put on the LB rack
1c. Take out new plates from the fridge and divide them into smaller sections (upto 24). This is the second-time plate. Make sure to write the date on it. Cross out in red pen any sections you know is wrong after the Colony PCR check
Steps
In this order:
- Select a colony using a tip or toothpick.
- Dip it in a PCR tube and swirl it around.
- Use the same tip and dip it in the LB culture and swirl it around.
- Use the same tip and draw on the 2nd time plate.
PCR run protocol:
| Temperature | Time | |
|---|---|---|
| 94oC | 60s | |
| 94oC | 15s | 30-35 cycles |
| 55oC | 20s | |
| 72oC | 1kb/min + 5-10s | |
| 72oC | 300s |
Making Gel for gel electrophoresis
- Make either 100ml or 200ml of gel at at time and select a relevant percentage (e.g. 1%, 1.5%, or 2%)
- Measure out the relevant percentage in agarose (e.g. 2g of agarose for 100ml of 2% gel).
- Fill it up with 1xTAE buffer.
- Microwave on low, constantly taking it out every so often to swirl and mix it. Keep microwaving until clear. Make sure it is completely clear
- Cool to a temperature that is still hot but still can be held in your hand. If the gel gets too cold and starts to harden, start microwaving again until clear.
- Add 5uL of Safe-seeing dye for every 100ml of gel after cooled to the correct tempearature. Mix it well by swirling
- Pour it onto the molds quickly. Put a cover on it to block out the light.
- Wait at least 1/2hr until using it.
- Store in 4o and away from light.
Gel electrophoresis
- Select a relevant % agarose gel based on your own experience (general guide: all <1000: 2%, all >2000: 1% [http://www.lifetechnologies.com/tw/zt/home/references/ambion-tech-support/rna-electrophoresis-markers/general-articles/gel-electrophoresis-tables.html guide])
- Load 5uL from each tube of Colony PCR, mix it with 1uL of 6x DNA Dye and put it in a well.
- Load 3uL of marker into a well.
- Run in the 13x13cm box at 90V or 100V and 400mA for the desired amount of time.
- View in the gel viewer machine.
Liquid culture
After confirming which colonies are correct from running the colony PCR on gel and deciding which ones to culture in liquid:
- Aliquot 6-15ml of LB in a 15ml centrifuge tube or 10ml of LB in a 50ml centrifuge tube for each colony.
- Add the 20uL of LB containing the correct colony from the 3-in-1 into the liquid.
- Add the relevant amount of antibiotics into the liquid
- 0.5uL of Ampicillin (100mg/ml) per 1ml of LB
- 0.5uL of Chloramphenicol (50mg/ml) per 1ml of LB
- Split the LB in the 15ml centrifuge tubes into multiple 15ml centrifuge tubes containing a maximum of 3ml each.
- Grow overnight at 37oC at 180rpm in the incubator.
Heavy day
The heavy day consists of extracting a previously grown plasmid, digesting it, and ligating digestions together, then transforming.
Plasmid extraction
We use GeneArt's plasmid extraction kit. We followed the protocol with the addition of warming the relevant amount of EB to 60-70oC before elution. Elute with 50uL. Plasmids are something to keep for a long time. Don't ever completely finish using a plasmid. Always make sure there is some left.
Digestion
We used Thermo's fast digest enzymes: EcoRI, XBaI, SpeI, PstI and used this modified double digest protocol:
Use Green Buffer for insert digests (ES,XP):
Thermo's fast-digest enzymes
| Item | XP from plasmid | XP from PCR |
|---|---|---|
| DNA | 1ug or 10uL | 10uL |
| 10x fast-digest (FD) buffer | 2 (green) | 2 (white) |
| Thermo XbaI | 0.5 | |
| Thermo PstI | 0.5 | |
| ddH2O | to 20uL | 6 |
| Total | 20 | |
Theoretically 10mins should be enough for this digestion. Over 1hr is better.
NEB enzymes:
| Item | SP | |
|---|---|---|
| DNA | 1ug or 10uL | |
| 10x Cutsmart Buffer | 2 | |
| NEB SpeI | 0.5 | |
| NEB PstI | 0.5 | |
| ddH2O | to 20uL | |
| Total | 20 | |
Digest for at least 1hr. Over 2hr is better.
Gel extraction and/or purification
We run Insert digests (ES, XP) on a gel and then use GeneArt's gel extraction kit. We directly use GeneArt's PCR purification kit for Vector digests (EX,SP). The modifications in the protocol include:
- Warm EB to 60-70oC before elution.
- Always use the Gel (sequencing) protocol for gel extraction. It's just essentially Wash buffer twice instead of W1 then Wash.
Ligation
We use Thermo's T4 Ligase:
| Item | amount |
|---|---|
| Vector | 8.5uL, total of approximately 100ng of DNA. |
| Insert | |
| ddH2O | |
| 10x Ligase Buffer | 1 |
| T4 Ligase | 0.5 |
| Total | 10 |
Incubate at room temperature for 17-30 minutes then transform 1uL THEN put the remaining amount in a small bag and put in 4oC overnight incase the transformation fails and retransformation is required.
Transformation
We use self-made E. coli K-12 MG1655 competent cells most of the time (it requires the long protocol [upto 3hrs], but only requires 11hrs to see colonies), or GeneArt's DG5α competent cells if there's only time for the short protocol [~15min]. MG1655 competent cells should not be refrozen.
| Step | Short | Long |
|---|---|---|
| Add 1uL of plasmid or ligation mix to competent cells (20-100uL of MG1655, 15-25uL of DH5α) | ||
| Put mixture on ice for | 5mins | 30-60mins |
| Heat shock at 42oC for 45 seconds. (very important step) | ||
| Add prewarmed LB and incubate at 37oC, 180rpm for 1-1.5hr | - | 200uL LB |
| Plate it on a relevant antibiotic plate | plate it all | 200uL on one plate, 20uL on another |
| Incubate plate at 37oC overnight | ||
Promoter Testing
These are the protocols we used for promoter testing
General Gene Reporter Assay protocol
This is our general setup for gene reporting assays.
Previous-night Preparation (~10m-60min)
Previous night:
- Culture overnight (~16hrs) at 37C and shaking at 180rpm 2-3ml of single colonies of things to be measured.
Preparation (can be done the previous night too):
- Determine the number of measurement points = number of items x number of replicates
- Prepare that amount of 15ml round-bottom tubes and 1.5uL microcentrifuge tubes.
- Add 2ml of LB + the relevant antibiotics in each round-bottom tube.
Pre-start (~30mins)
Preparation:
- Prewarm the LB+antibioics to the temperature to test at (e.g. 20mins prewarming in the incubator takes it up to 37C).
- Get some ice buckets and pre-cool down the 1xPBS
Culturing (2~3mins)
- Add any relevant chemicals to the prewarmed round-bottom tubes containing 2ml LB.
- Dilute the overnight culture to an OD600 of about 0.0325
- Incubate at the required conditions (usually 37C and 180rpm).
- Repeat for every replicate.
Measurement point retrieval
For each culture tube:
- Take out the relevant culture and put it on ice
- Extract 1.3ml from the culture tube and put it in an 1.5uL microcentrifuge tube
- Centrifuge for 1min at 16.2g (13.2rpm on tabletop centrifuge)
- WASH: Tip out the supernatant and add 650uL of 1xPBS, resuspend, then centrifuge again.
- WASH again.
- Carefully remove and discard all the supernatant, resuspend in 1.3ml of 1xPBS.
- Store at 4C until measuring
Measuring
Requires black plates for measuring fluorescence and transparent plates for measuring OD600. For each measurement point, load 200uL each into 3 black wells and 3 transparent wells (i.e. 3 technical replicates each for fluorescence and OD600). Measure the fluorescence on the black plate with the settings depending on your machine. We use excitation/emission wavelength of 485/525 (100ms per measurement). Measure the OD600 on the transparent plate.
H202 Promoter Gene Reporter Assay
For measuring promoters under different H202 stress concentrations: (e.g.: 0.01mM, 0.05mM, 0.1mM, 0.5mM, 1mM, 2mM, 2.5mM, 5mM).
- Add the H202 just before adding the bacteria.
For reporting assays using 2ml round-bottom tubes:
- First serially dilute the relevant concentrations from the stock (35%) everytime the experiments start.
- Add 13.4uL of the relevant concentration of H202 into the tube.
| 35% | 3.5% | 1.75% | 0.875% | 0.7% | 0.35% | 0.175% | 0.035% | 0.0035% | 0.00175% | |
|---|---|---|---|---|---|---|---|---|---|---|
| 5mM | 13.4 | |||||||||
| 2.5mM | 13.4 | |||||||||
| 2mM | 13.4 | |||||||||
| 1mM | 13.4 | |||||||||
| 0.5mM | 13.4 | |||||||||
| 0.1mM | 13.4 | |||||||||
| 0.05mM | 13.4 | |||||||||
| 0.01mM | 13.4 |
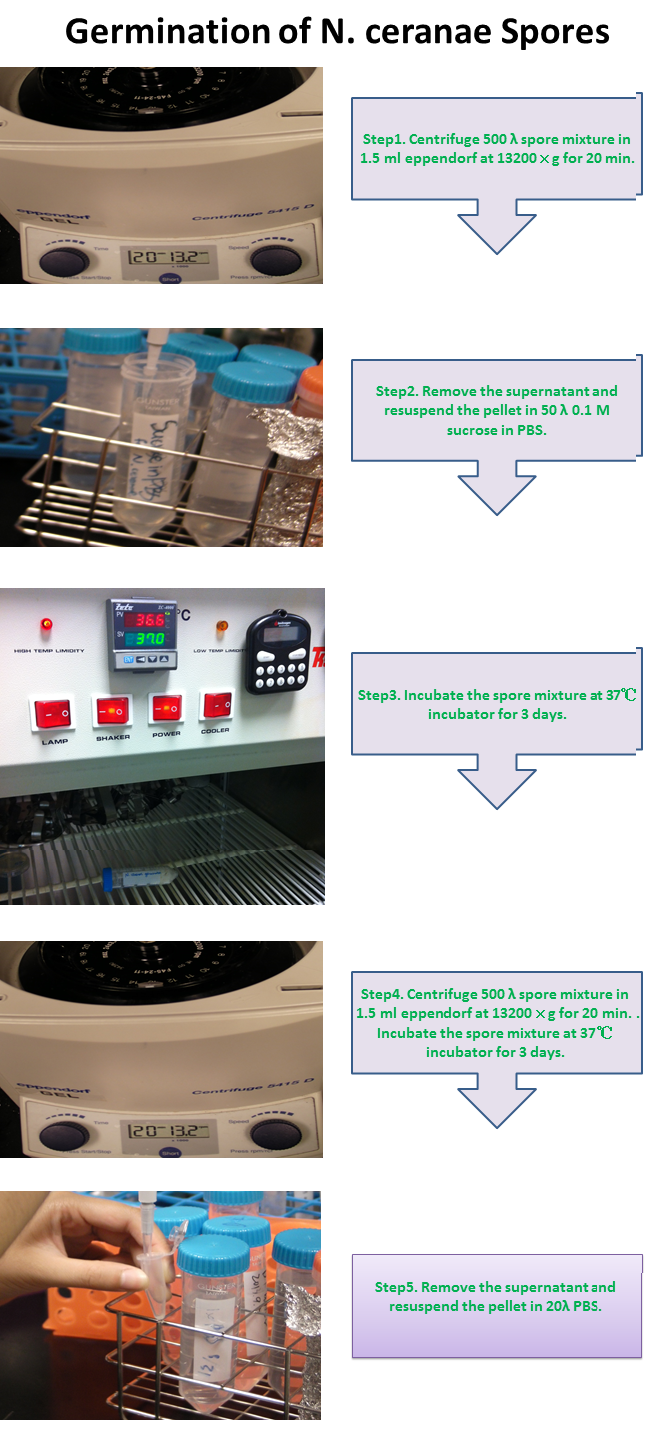
Inhibition of Spore Germination Testing---Mannosidase Function Assay
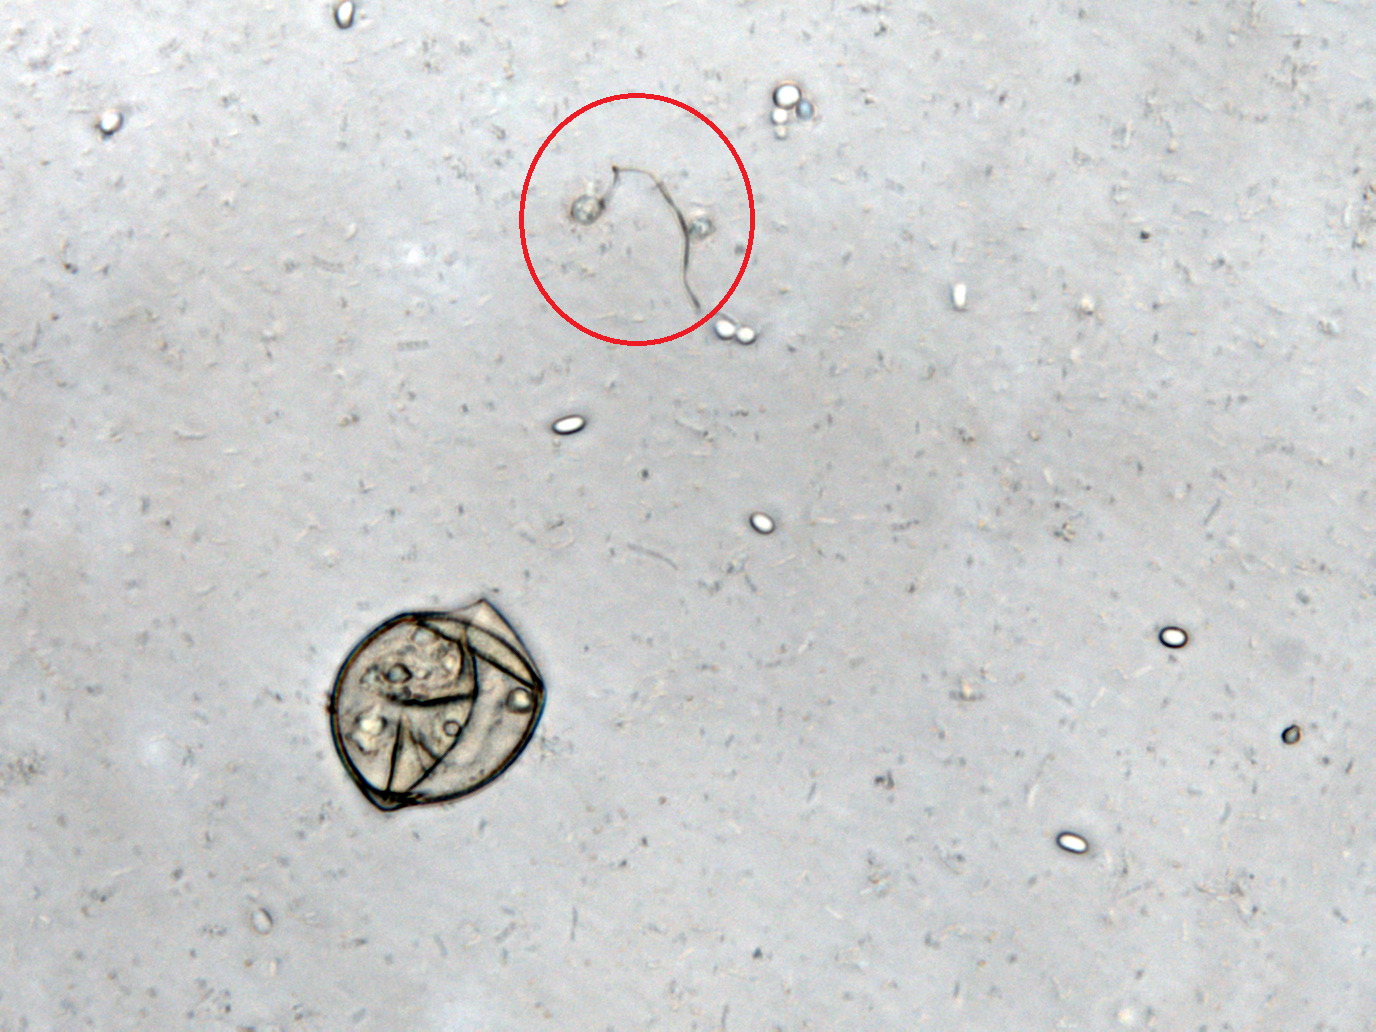
We define the germination degree as follows:
And so far we have accomplished experiments of the first two groups, discovering that spores underwent the germination procesure got much more points than the control group. Next we will compare the points of group 3 and group 4 to see if Bee. coli can inhibit the germination of N. ceranae.
 "
"


